How to Make a PDF Smaller Without Making It Blurry
“Compress PDF” can mean two very different operations: cleaning the file's structure or throwing away visual information. Knowing which one you need is the difference between a smaller document that still prints well and a blurry scan that only looks acceptable at thumbnail size.
A PDF that is too large for an email attachment is not necessarily badly made. A document can be heavy because it contains a set of full-resolution photographs, because every page carries its own copy of a font, or because an export tool left behind unnecessary metadata and duplicated objects. Those causes need different repairs.
The phrase “compress without losing quality” is useful only after you define quality. For a text-heavy report, quality may mean selectable text, searchable pages, intact vector diagrams, and fonts that print correctly. For a scanned form, quality may mean readable small type and enough resolution for a signature or stamp. For a photo portfolio, quality may be judged by image detail and color. A single compression setting cannot protect all three equally.
First identify what makes the file large
Open the PDF and zoom into a page with small text. If the text remains sharp at high zoom, the document probably contains a real text layer or vector drawing. If every page is a photograph, the images are likely responsible for most of the bytes. A file with hundreds of pages may also be large simply because it contains more content than the upload limit was designed to accept.
Metadata and document structure can matter too. PDF files are collections of objects connected by references: page trees, fonts, images, content streams, annotations, and a cross-reference table. Editing software may leave unused objects or verbose metadata behind. Removing that overhead can produce a smaller file without changing a single visible pixel.
Structural compression is the safe first step
Structural compression rewrites the PDF's internal organization. It can use object streams, compress content streams, remove empty metadata fields, and reduce duplicated overhead. It does not need to rasterize the page or lower the resolution of a photograph.
That is the approach used by the PDF compressor. It reports the actual before-and-after size instead of promising a fixed percentage, because some PDFs have a lot of structural waste and others do not. A PDF made mostly of already-compressed camera images may barely shrink. That is not a failed promise; it is an honest description of where the bytes are.
The result should still be checked. Open several pages, search for a phrase, click a link if the document has links, and inspect a page with a form field or annotation. A valid file that opens is not proof that every important feature survived.
When reducing pixels is unavoidable
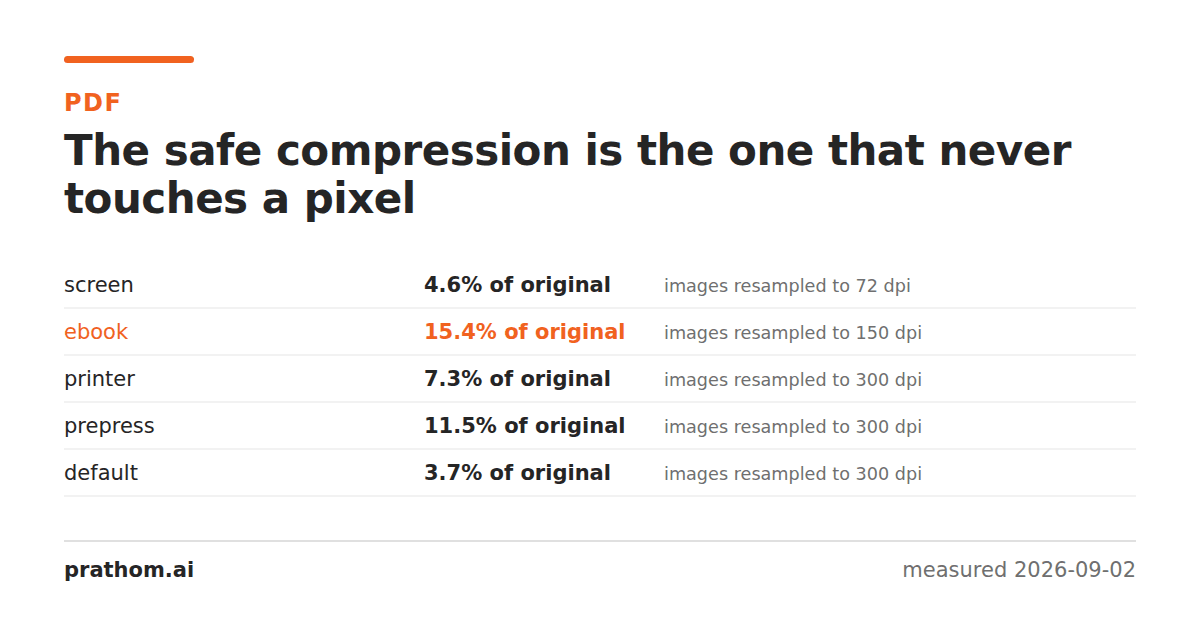
If the PDF is a collection of large scans or photographs, structural rewriting cannot remove the main cost without touching the images. To make a meaningful reduction, the images must be resampled, re-encoded, or both. That is a quality decision, not a housekeeping step.
For a screen-only document, 150 DPI may be sufficient for many scanned pages. For ordinary office printing, 200 to 300 DPI is a safer range. A photograph placed at four times the size it will ever be displayed contains wasted pixels, but a small receipt with fine type can become unreadable if you reduce it too aggressively.
A useful test is to choose the smallest page that contains the detail you care about. Compress a copy, then view it at the intended reading size rather than only looking at the file-size number. If an image must be extracted and resized separately, PDF to JPGcan make the raster step explicit, while Image Compressorlets you work toward a target size for those images before assembling a new document.
A practical order of operations
Keep the original PDF. Run structural compression first because it has the lowest visual risk. Compare the byte count and open the output. If it is still too large, decide whether the destination is email, a browser upload, screen reading, or print. That destination determines how much image information you can afford to remove.
Do not repeatedly convert the same output. Each lossy image re-encode can discard more detail, and a PDF converted to images and rebuilt may lose selectable text, links, bookmarks, accessibility data, and form fields. Start again from the best original when you need a different output target.
Finally, check the pages that matter rather than trusting the file extension. A smaller PDF is successful only if the recipient can open it, read the smallest text, see the relevant image detail, and use the document features your workflow depends on. File size is a constraint; it is not the definition of a good result.